


← Back to Shares
Integration & Orchestration Platforms
This is some text inside of a div block.
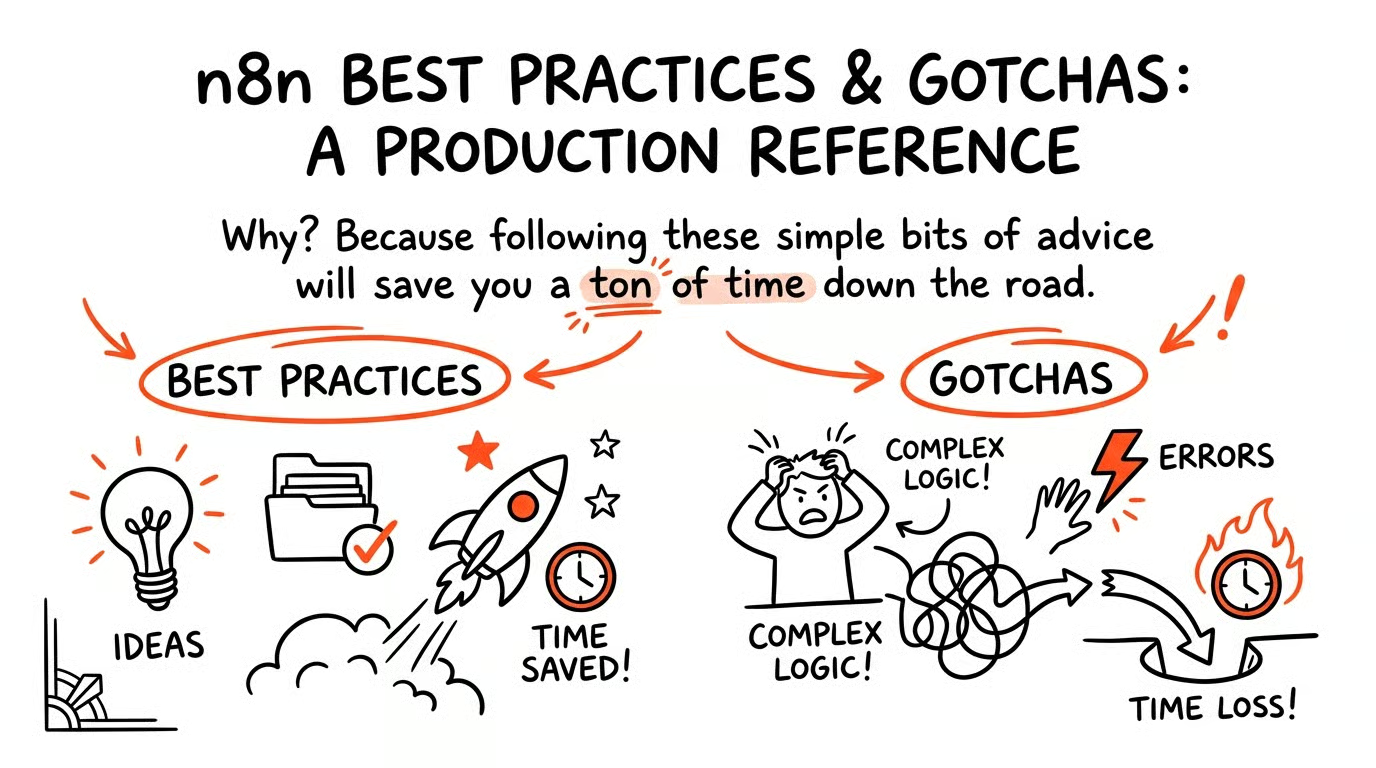
# n8n Best Practices & Gotchas: A Production Reference Source: https://behindthescenes.digitisingevents.com/shares/n8n-best-practices-gotchas-a-production-reference # **n8n Best Practices & Gotchas: A Production Reference** Why? Because following these simple bits of advice will save you a ton of time down the road. A lot of the automations or workflow experiments on digitising events have been orchestrated using make.com. And it works well; however, one of the things that goes against it, especially when you are building with AI (where you will more often than not have to run through many loops and iterations), is its pricing model. Make.com charges one credit for each module that's executed, and we were burning through our credits at an alarming rate, so we wanted to look for a different alternative. We'd always been aware of n8n and resisted using that in our work because it is much more developer-centric, not just in how it works but in how it's presented. You hit code pretty quickly, or what looks like code. However the credit munching behaviour of [Make.com](http://Make.com) tipped us towards N8n, or at the very least using a hybrid model where we use both. Applying it in practice, we quickly ran into some specific nuances on n8n, which is true of any platform. We felt it would be useful to share some of the best practices that we found through our own research, AI research, and building where we transferred relatively complex Make.com workflows into n8n. Why? Because following these little bits of advice will save you a tonne of time down the road. # **Our biggest advice: Create a "Config" or "Set Variables" Node At the beginning of your workflow.** Place a **Set (Edit Fields) node** at the very start of every workflow (that goes beyond 5 steps) and use it to define all configuration values. This is something I do on make.com as well, using their Set multiple variables module, and it's exactly the same outcome you're solving for here on n8n. You really don't want to have to remember which node, using the n8n convention, you put a particular value into and then go rummaging around in some complex workflows because you just want to change a setting. By setting variables at the start and referencing them downstream, changing settings becomes trivial. What was new to us using n8n is the suggested best practice of adding \- board IDs, environment paths, API endpoints, thresholds. Then reference them everywhere with. $('Config').item.json.boardId. This gives you a single place to change values without hunting through every node. Note $('Config') is the name of the node you have set these variables in our case this was {{$('Set Flow Variables').item.json.inputUri }} // In your opening Set node named "Config": // boardId: "abc123" // environment: "production" // Anywhere downstream: "{{$('Config').item.json.boardId}}" # **1\. Node References: The Most Critical Gotcha** ## **Always Use Explicit Named References** This is the single most important habit to establish from day one. By default, n8n inserts $json.fieldName when you drag a value into an expression. This is an implicit shorthand that means 'the item coming into this node right now.' The moment you insert a **new node upstream, reorder nodes, or branch the workflow**, the reference breaks silently; it now pulls from the wrong predecessor. This is very different from [make.com](http://make.com) where the references are updated dynamically when you reorder or move modules around. ## **The correct pattern:** // ❌ Fragile — breaks if you insert or move a node "outputUri": "{{$json.outputUri}}" // ✅ Stable — always points to the named node regardless of position "outputUri": "{{$('Set Variables').item.json.outputUri}}" The $('Node Name') syntax is the new standard. It uses n8n's item-linking logic (paired items) and is the actively maintained approach. The older $node\["Node Name"\] javascript style syntax is deprecated It still works, but it matches items by index rather than by item lineage, which causes errors if the number or order of items changes. ### **The Two Reference Syntaxes Compared** | Syntax | Status | Behaviour | | :---- | :---- | :---- | | $json.field | ⚠️ Avoid for production | References the immediately preceding node; breaks on reorder | | $node\["Node Name"\].json.field | ⚠️ Legacy/deprecated | Index-based matching; errors if item count changes | | $('Node Name').item.json.field | ✅ Preferred | Item-linked, stable, works regardless of position | # **2\. Node Naming Conventions** ## **Use Descriptive, Unique, Sentence-Style Names** Node names are not just labels in n8n, they are the reference targets in your expressions. A poorly named node becomes a maintenance nightmare. This is also good practice in general and is becoming increasingly relevant, because if you choose to copy and slap the whole workflow into an LLM to get it to troubleshoot, the more descriptive you are, the better it will perform. ## **Some Rules to follow:** * **Be descriptive and specific.** Replace HTTP Request 2 with Run Transcoder Job: 1600 x 900 or Send Slack Alert. Future-you, More importantly, your team, will understand it immediately. * **Write it as a readable story.** Reading node names top-to-bottom should describe what the workflow does in plain English. If → bad. Does user have email? → good. * **Names are case-sensitive.** $('Set Variables') and $('set variables') reference different nodes, not surprising in a JavaScript-based system. Inconsistent casing is a silent, hard-to-debug gotcha. * **Names must be exact.** If a node name has spaces, they must be preserved in the reference string. Renaming a node after referencing it will auto-update most references in the UI, but any hardcoded references in **Code nodes** will silently break. * **Avoid special characters.** Keep names alphanumeric with spaces. Exotic characters in JavaScript systems just avoid, avoid, avoid. Characters like dollar signs, asterisks, even dots, because they have a meaning within Javascript / JSON. If you are labelling your nodes using those characters, you can end up in a world of pain. * **On camelCase vs sentence-case:** Sentence-case (e.g., Get Customer Data) is the community convention. Personally I prefer camelCase (getCustomerData) for programmatic consistency. So what I do is use camel case for variables, which just removes the space when referencing them, but I'm going with the community convention of sentence case in naming the nodes. # **3\. Expression Syntax Gotchas** ## **The {{}} Toggle Trap** n8n fields default to **Fixed Value** mode in nodes. If you type $json.name into a field that is still in fixed mode, it is treated as a literal string, **not evaluated as an expression**. Always toggle the field to Expression mode first (the expression toggle icon), or use the / shortcut in the expression editor. ## **Webhook Data Lives Under .body** The single most common expression error for webhook-triggered workflows: the Webhook node wraps incoming payloads under a .body property to preserve metadata like headers and query parameters. Trying to access $json.email when you want $json.body.email will return undefined. // ❌ Root access — undefined for webhook payloads $json.email // ✅ Correct path for webhook body data $json.body.email // Headers $json.headers\['x-api-key'\] // Query params $json.query.page ## **Accessing Nested Data** $json.company returns the entire company object, not the company name. Always drill all the way down to the exact field using dot notation. Again, this is typical behaviour for a JavaScript-based system: // ❌ Returns the whole object $json.company // ✅ Returns the string value $json.company.name ## **Fields with Spaces or Special Characters** Use bracket notation, Common with JavaScript-based systems, for field names that contain spaces or special characters: $json\['field name with spaces'\] $('My Node').item.json\['some-hyphenated-key'\] # **4\. Code Node Patterns & Gotchas** The Code node, as the name implies, allows you to put a bunch of code into a node and is probably the most powerful feature within n8n. Until recently, make.com didn't have an equivalent, and they have since released one, because with the world moving so fast, there are just times when a little snippet of code solves a whole load of things much faster within the workflow. Happily for us, even if you're a non-coder, you now have an LLM that can write the thing for you, but there are still some nits that you need to know. ## **Return Format Is Mandatory** The Code node must return an array of objects with a json property. Missing this wrapper is the most common Code node failure. We found this our that hard way. // ❌ Breaks downstream nodes return { name: "Adam" }; // ✅ Correct format return \[{ json: { name: "Adam" } }\]; ## **Never Use {{}} Inside a Code Node** Expression syntax ({{ }}) is for the expression editor in non-code fields. Inside a Code node you write plain JavaScript (or Python if that's your thing). Using {{}} will throw a syntax error. ```javascript // ❌ Wrong this is not the expression editor const name = {{ $json.name }}; // ✅ Correct — plain JS access in Code nodes const items = $input.all(); const name = items.json.name; const aspectRatios = { landscape: '16:9', square: '1:1', portrait: '9:16' }; ``` ## **$input vs Legacy items** The Code node replaced the old Function node. If you're following older tutorials, items are no longer defined directly. Use $input.all() for all items or $input.first() for the first item:\[18\]\[19\] // ❌ Legacy — throws "items is not defined" items.json.field // ✅ Modern const items \= $input.all(); items.json.field // Or reference a specific node in Code context $('Node Name').all().json.field ## **Always Set pairedItem in Code Nodes** When your Code node outputs more items than it received, or restructures items, downstream expressions using $('YourCodeNode').item will break unless you manually set pairedItem. This is the item-linking mechanism that keeps the data lineage intact (Simple, layman's terms: this is like a cross-reference. ) return items.map((item, index) \=\> ({ json: { transformed: item.json.value }, pairedItem: index // Links each output back to its source input })); # **5\. Error Handling Patterns** ## **Never Deploy Without an Error Workflow** Every production workflow should have an Error Workflow set in **Workflow Settings → Error Workflow**. This catches any unhandled exception and sends a notification containing the workflow name, the failing node, the error message, and a timestamp. Without this, failures disappear silently. We were caught out by this when we first spun up our n8n, thinking that, as with make.com, we'd get emails when something broke, but that's not the case. What we did is just create a simple workflow that takes the error and sends us an email. What seems a little bit tedious at first is actually quite nice, because the other thing that you can do is you can have different types of error workflows. For example, in certain workflows you may not want to get an email; you may want to get the error written into and sent to a Slack message or what have you. In this way, you can really define what happens when errors get generated off the back of each workflow, and that can be useful. ## **The Try/Catch Pattern for HTTP Calls** n8n does not automatically treat a 400 or 500 HTTP response as a workflow error — only thrown exceptions stop the flow. Implement explicit status checking: 1. Enable **Retry on Fail** on HTTP API Requests (settings tab on the node) 2. OR Enable **Continue On Fail** on the HTTP Request node (see below) 3. Add an **IF** node checking $json.error or the status code 4. Route the error branch to a notification/logging step 5. Route the success branch to continue processing This is similar to the best practice that we do within our make.com workflows. If you think about it, while we are somewhat spoiled with the robustness of modern APIs, most of the time when you do these kinds of workflows, you are sending over a request to an API endpoint, getting it to do something, and taking it back. There are rare occasions when that API will momentarily fail or not be available, like when you're sending a transcoder job. Setting the request on fail and timeout, what that basically does is it waits five seconds. That's what I usually recommend: set it to five seconds. It tries the API again, and nine times out of ten it will work and you won't have a failure. ## **When NOT to Use Continue On Fail** This setting is powerful but dangerous in financial, order, or CRM workflows. Partial writes create reconciliation problems. Use Continue On Fail only when a failed item should be skipped and logged, not retried or reversed. ## **Advanced: Implement Exponential Backoff for Retries** For transient API failures, use a Wait node with increasing delays rather than immediate retries. Most APIs throttle repeated instant retries more aggressively. Heavily used APIs will often put on rate limits, like, for example, the image generation APIs. This is a useful tactic, but it is not one that I would recommend as default. I would put this in where you know that the APIs are heavy. Again, talking about image generation in our specific use case of video generation, this is a very useful tactic in those situations. # **6\. Sub-Workflow / Microservices Architecture** Often, people who come to automation platforms like N8n or Make.com are not programmers and are, as one comment on my YouTube channel said, "business owner masquerading as a developer". If this describes you, this is some advice that could save you a lot of time and effort. ## **An example of how this helps:** You see all these YouTube videos with massive workflows on a big canvas, 50, 30 different nodes, and I've seen this for any 10 and make dot com. Once you start getting into this, your rule of thumb should be: if you're getting beyond 10, I know people say 20, 30 nodes is fine, but I think if you're getting beyond 10, you should be thinking in a more microservices way, and I'll explain this in non-programmatic language. Pick a workflow that optimises your video, because you want to play it on your website. You know that having a video on your website that's optimised for web delivery is going to be a much better user experience, because the file is going to be slower and so on and so on. And you know you're going to have to optimise it for what's known as form factor. The video on the mobile device should be smaller, and by smaller I mean not just size, but also in terms of the amount of data it has, than, let's say, the desktop, the laptop, or the tablet. In an ideal world, you'd want three versions. This is when the sort of subworkflow microservices way of thinking about your workflow really comes into play, and I think it's a good story to bring what this means to life. To generate each one of those videos, you will need to have them transcoded, let's use the word optimised to keep it more colloquial. Each of those optimisations is going to be its own run, and you're going to want to do that through some API that allows you to optimise based on what information you give it. In plain English, that would be: here is a video file; optimise it for mobile, make it 600 pixels wide, don't make it HD. You get the idea. Now, if you're designing a workflow, you could do that in one go, so you would have something that gives you the source file; then you'd have another node down the road that gives you the desktop version; then you'd have another one that gives you the tablet version; and then you'd have another one that gives you the mobile version. You then finish off that workflow by taking each one of those outputs and storing them somewhere. You may even go further and say, "I don't want to store them. I want this to be pushed into my website as well," so you'd carry on and do that. You don't have to be building the workflow to see that there are already a lot of steps. I find it super useful just to break down the tasks you want the workflow to do, either on a piece of paper or digitally. It doesn't matter, and you will quickly see what the repeatable tasks are. In the example above, you know that you're going to have to call the API that optimises your video three times, and that is a repeatable, defined job. You may even want to, as you start building out what you're doing, have that optimisation happen in other workflows, so that's a prime candidate for a subworkflow. You will create a sub-workflow that accepts the information from any workflow that you've designed, and it gives you back the destination of the optimised video. We take the example I've shared above, which is a real one that we've done again as a case study just to help you start thinking in this way. There is another job that you may want to make repeatable and have access to from many different scenarios, and that is pushing these videos into your content management system or your website or wherever you want to end, wherever they need to end up. That's another potential sub-workflow or microservice, whatever terminology is used, but it's a discrete, repeatable workflow. Here is the big "why should I bother?" question, because you might be reading this. Yes, you are right. You can put it all into one end-to-end workflow, and it'll work. Of course it will, but ask yourself some "what if" questions again when you are designing your workflows. In the context of this example, it would be: what if I found a cheaper way of optimising these videos? If you're doing it at scale, if you can save 20% on the cost of optimisation, you may want to do that. Or what if I wanted to swap out the end destination that serves these videos? I want to move from Webflow to the latest new CMS or whatever the situation is. Both of those scenarios, in our case, are highly likely. If we were to build the workflow that I've described in this example in a way where each and every transcoder step is a part of every workflow that requires a transcoder, you can imagine our ability to be able to switch to a cheaper way of optimising the videos (while not impossible) suddenly creates a lot more work in the future. Because if we design down the sub scenario route, all we would have to do is change that one sub scenario, and suddenly every single video optimisation request is now using the cheaper or more reliable optimisation service. Or conversely, if we were to swap away from Webflow and have the need to push our videos or content to a different destination, again, it is much easier to update one sub-workflow than to go through and try and remember every single workflow that is pushing content to a serviceable destination. In this very fast-changing world of AI-driven technology, you want to remove as much friction as you can from your ability to adopt and move towards new or different technology solutions. That ability within your business will also be a big differentiator in how quickly you can act on opportunities driven by new technologies. ## **As a rule of thumb: Break Large Workflows into Sub-Workflows** Beyond 20-30 nodes, a single workflow becomes difficult to debug and maintain. Extract reusable logic into sub-workflows with strict input/output contracts. Ideal candidates for extraction: * Logic used in multiple parent workflows (e.g., "resolve user ID to Slack ID", “transcode a video”, “update related content on an article”) * Heavy processing that benefits from fire-and-forget execution * Error notification/logging pipelines ## **Data Passing Gotcha** When using the **Execute Sub-workflow** node, only the data in the *currently active* $json is passed to the sub-workflow. If you need data from multiple upstream nodes, use a **Merge** node first to combine them into a single item, then pass that to the sub-workflow. ## **Test Sub-Workflows in Isolation** Never test a sub-workflow only by running the parent. Open the sub-workflow directly, simulate the trigger with a Manual Trigger node and pinned test data, and validate it independently before integrating. # **7\. Variable and Data Management** ## **The "Config" Node is Your Friend** As described above, a Set node named Config at the start of a workflow is the most widely recommended pattern for managing workflow-scoped variables. * Centralises all configurable values in one place * Makes swapping staging vs production values trivial * Ensures downstream references are always explicit named references ## **Workflow Static Data for Loop State** When you need a variable that persists and updates across loop iterations (not just a config value), use **Workflow Static Data** inside a Code node. This is the only built-in mechanism for maintaining mutable state within a single execution. ## **Enterprise vs. Community Variable Scope** Custom Variables (instance-wide constants available in all workflows) are a Pro/Enterprise feature. On the community self-hosted edition, use environment variables ($env.MY\_VAR) for instance-level constants, and Set nodes for workflow-level constants. # **8\. Performance & Scale** ## **Use SplitInBatches for Any Dataset Over \~50 Items** Processing all items in one shot exhausts memory and triggers execution timeouts on large datasets. The SplitInBatches node divides input into chunks and loops: * **General APIs:** batch size 50–100 * **Database inserts:** batch size 100–500 * **LLM calls or large payloads:** batch size 10–20 * **Billing/financial operations:** batch size 1 (fail fast, never partially commit) Add a **Wait** node after the HTTP Request in your loop to introduce deliberate pauses and avoid rate limit responses.\[^32\] ## **Large Binary Data (Like AI Image Generation)** For workflows processing files, set N8N\_DEFAULT\_BINARY\_DATA\_MODE=filesystem in your environment. This stores binary data on disk rather than in memory and the database, preventing RAM exhaustion. ## **Parallel Execution** Independent branches can run simultaneously by connecting a single node to multiple downstream nodes. This is preferable to sequential processing for tasks that have no data dependency between them. # **9\. Security** ## **Never Hardcode Secrets in Nodes** Typing API keys or passwords directly into a Set node, HTTP Request, or Code node leaks them into workflow JSON exports, screenshots, and version control. The safe pattern for the community edition is. **Use n8n Credentials system**, for any external service connection. Credentials are encrypted at rest and rotatable without editing workflow nodes. ## **Secure Every Webhook** Publicly accessible webhook URLs should always use at minimum one of: * **Header Auth / Basic Auth**, built into the Webhook node's Authentication dropdown * **JWT Auth**, validate bearer tokens via JWKS * **HMAC signature verification,** confirm the request came from the expected sender by verifying a shared-secret signature on the payload Never rely on a secret URL alone. Treat the webhook URL as potentially leaked and enforce explicit auth. # **10\. Testing & Debugging** ## **Pin Data After Expensive Operations** Use the **Data Pinning** feature (the pin icon in the Output panel) to freeze node output during development. This is essential after: * Webhook triggers (so you don't need to re-fire external events) * API calls that cost money or have rate limits * Long-running operations (LLM calls, DB queries) Pinned data is only used during test executions. Production runs always re-execute normally. ## **Build Incrementally, Pin as You Go** The recommended development loop: 1. Build one node, configure it 2. Run and verify its output 3. Pin the verified output 4. Add the next node, test with Test Step 5. Repeat before running the full workflow ## **Use Smaller Datasets During Development** Reduce batch sizes to 1–5 items and use pinned mini-datasets while building. Scale up to real data only in staging. ## **Debug Large Workflows** For workflows with performance issues, disable **Save Execution Progress** in Workflow Settings to reduce database I/O. Use a Code node with console.log(JSON.stringify($input.all())) at the start of sub-workflows to verify exactly what data is being passed from the parent. # **11\. Versioning & Deployment, for when things get serious.** ## **Treat Workflows as Code** Export workflow JSON to Git for version control. n8n Enterprise includes a built-in **Source Control** feature (Settings → Source Control) that connects directly to a Git repo and supports branch-based promotion (dev → staging → prod). For community edition, which we are using, use separate n8n instances per environment and export workflow JSON manually or via the n8n API (POST /source-control/pull). ## **Credentials Are Not Versioned** When using n8n's Git source control, credentials are intentionally excluded from the repository by design. Manage credentials separately per environment. Never commit credential values to version control. ## **Tag Everything** Use n8n's workflow tags to encode environment, service, version, and deployment status. Example tag schema: env:production, service:events-pipeline, v1.4, status:deployed. This makes filtering and auditing at scale tractable. # **Quick Reference: A n8n Gotchas Summary** | Gotcha | What Breaks | Fix | | :---- | :---- | :---- | | Using $json.field in expressions | Silently references wrong node after a reorder | Always use $('Node Name').item.json.field | | $node\["Name"\] (suggested by some llm’s) instead of $('Name') | Index-based matching breaks when item count changes | Use $('Name') — $node\[\] is deprecated | | Field in Fixed mode, not Expression mode | Expression treated as literal string | Toggle field to Expression mode first | | Webhook data at $json.field | Returns undefined | Access via $json.body.field | | Missing pairedItem in Code node | Downstream $('CodeNode').item breaks | Always include pairedItem: index when mapping items | | No { { } } return wrapper in Code node | Downstream nodes receive malformed data | Return \[{ json: { ... } }\] always | | items variable in Code node | Throws "items is not defined" | Use $input.all() instead | | Hardcoded secrets in Set/Code nodes | Secrets leak into JSON exports | Use n8n Credentials or $env.VAR\_NAME | | No Error Workflow set | Failures disappear silently | Set an Error Workflow in every production workflow | | Passing data from only the last node to sub-workflow | Missing upstream data in sub-workflow | Merge all needed data into one item before Execute Sub-workflow | | Testing sub-workflows only via parent | Bugs are harder to isolate | Always test sub-workflows independently with pinned data | | Processing large datasets without batching | Memory exhaustion, timeout failures | Use SplitInBatches with appropriate batch sizes | Human-verified, using HITL AI Methodology. Published by Digitising Events.com a live experiment in running an agentic business.

n8n Best Practices & Gotchas: A Production Reference

Best practices we documented when moving over to n8n

A lot of the automations or workflow experiments on digitising events have been orchestrated using make.com. And it works well; however, one of the things that goes against it, especially when you are building with AI (where you will more often than not have to run through many loops and iterations), is its pricing model. Make.com charges one credit for each module that's executed, and we were burning through our credits at an alarming rate, so we wanted to look for a different alternative.

We'd always been aware of n8n and resisted using that in our work because it is much more developer-centric, not just in how it works but in how it's presented. You hit code pretty quickly, or what looks like code.

However the credit munching behaviour of Make.com tipped us towards N8n, or at the very least using a hybrid model where we use both.

Applying it in practice, we quickly ran into some specific nuances on n8n, which is true of any platform. We felt it would be useful to share some of the best practices that we found through our own research, AI research, and building on n8n to replicate / transfer relatively complex Make.com workflows into n8n.

Why? Because following these little bits of advice will save you a tonne of time down the road.

Our biggest advice: Create a "Config" or "Set Variables" Node At the beginning of your workflow.

Place a Set (Edit Fields) node at the very start of every workflow (that goes beyond 5 steps) and use it to define all configuration values. This is something I do on make.com as well, using their Set multiple variables module, and it's exactly the same outcome you're solving for here on n8n. You really don't want to have to remember which node, using the n8n convention, you put a particular value into and then go rummaging around in some complex workflows because you just want to change a setting. By setting variables at the start and referencing them downstream, changing settings becomes trivial.

What was new to us using n8n is the suggested best practice of adding - board IDs, environment paths, API endpoints, thresholds. Then reference them everywhere with.

$('Config').item.json.boardId . This gives you a single place to change values without hunting through every node. Note $('Config') is the name of the node you have set these variables in our case this was { {$('Set Flow Variables').item.json.inputUri } }

// In your opening Set node named "Config":
// boardId: "abc123"
// environment: "production"
// Anywhere downstream:"{ {$('Config').item.json.boardId} }"

1. Node References: The Most Critical Gotcha

Always Use Explicit Named References

This is the single most important habit to establish from day one. By default, n8n inserts $json.fieldName when you drag a value into an expression. This is an implicit shorthand that means 'the item coming into this node right now.' The moment you insert a new node upstream, reorder nodes, or branch the workflow, the reference breaks silently; it now pulls from the wrong predecessor. This is very different from make.com where the references are updated dynamically when you reorder or move modules around.

The correct reference pattern:

// ❌ Fragile — breaks if you insert or move a node"outputUri": 
"{ {$json.outputUri} }"
// ✅ Stable — always points to the named node regardless of position"outputUri": 
"{ {$('node name').item.json.outputUri}}"


The $('Node Name') syntax is the new standard. It uses n8n's item-linking logic (paired items) and is the actively maintained approach. The older $node["Node Name"] javascript style syntax is deprecated It still works, but it matches items by index rather than by item lineage, which causes errors if the number or order of items changes.

The Two Reference Syntaxes Compared

Syntax Status Behaviour
$json.field ⚠ Avoid for production References the immediately preceding node; breaks on reorder
$node["Node Name"].json.field ⚠ Legacy/deprecated Index-based matching; errors if item count changes
$('Node Name').item.json.field ✅ Preferred Item-linked, stable, works regardless of position

2. Node Naming Conventions

Use Descriptive, Unique, Sentence-Style Names

Node names are not just labels in n8n, they are the reference targets in your expressions. A poorly named node becomes a maintenance nightmare. This is also good practice in general and is becoming increasingly relevant, because if you choose to copy and slap the whole workflow into an LLM to get it to troubleshoot, the more descriptive you are, the better it will perform.

Some Rules to follow:

  • Be descriptive and specific. Replace HTTP Request 2 with Run Transcoder Job: 1600 x 900 or Send Slack Alert. Future-you, More importantly, your team, will understand it immediately.
  • Write it as a readable story. Reading node names top-to-bottom should describe what the workflow does in plain English. If → bad. Does user have email? → good.
  • Names are case-sensitive. $('Set Variables') and $('set variables') reference different nodes, not surprising in a JavaScript-based system. Inconsistent casing is a silent, hard-to-debug gotcha.
  • Names must be exact. If a node name has spaces, they must be preserved in the reference string. Renaming a node after referencing it will auto-update most references in the UI, but any hardcoded references in Code nodes will silently break.
  • Avoid special characters. Keep names alphanumeric with spaces. Exotic characters in JavaScript systems just avoid, avoid, avoid. Characters like dollar signs, asterisks, even dots, because they have a meaning within Javascript / JSON. If you are labelling your nodes using those characters, you can end up in a world of pain.
  • On camelCase vs sentence-case: Sentence-case (e.g., Get Customer Data) is the community convention. Personally I prefer camelCase (getCustomerData) for programmatic consistency. So what I do is use camel case for variables, which just removes the space when referencing them, but I'm going with the community convention of sentence case in naming the nodes.

3. Expression Syntax Gotchas

The {{}} Toggle Trap

n8n fields default to Fixed Value mode in nodes. If you type $json.name into a field that is still in fixed mode, it is treated as a literal string, not evaluated as an expression. Always toggle the field to Expression mode first (the expression toggle icon), or use the / shortcut in the expression editor.

Webhook Data Lives Under .body

The single most common expression error for webhook-triggered workflows: the Webhook node wraps incoming payloads under a .body property to preserve metadata like headers and query parameters. Trying to access $json.email when you want $json.body.email will return undefined.

// ❌ Root access — undefined for webhook payloads
$json.email
// ✅ Correct path for webhook body data
$json.body.email
// Headers
$json.headers['x-api-key']
// Query params
$json.query.page

Accessing Nested Data

$json.company returns the entire company object, not the company name. Always drill all the way down to the exact field using dot notation. Again, this is typical behaviour for a JavaScript-based system:

// ❌ Returns the whole object
$json.company
// ✅ Returns the string value
$json.company.name

Fields with Spaces or Special Characters

Use bracket notation, Common with JavaScript-based systems, for field names that contain spaces or special characters:

$json['field name with spaces']
$('My Node').item.json['some-hyphenated-key']

4. Code Node Patterns & Gotchas

The Code node, as the name implies, allows you to put a bunch of code into a node and is probably the most powerful feature within n8n. Until recently, make.com didn't have an equivalent, and they have since released one, because with the world moving so fast, there are just times when a little snippet of code solves a whole load of things much faster within the workflow. Happily for us, even if you're a non-coder, you now have an LLM that can write the thing for you, but there are still some nits that you need to know.

Return Format Is Mandatory

The Code node must return an array of objects with a json property. Missing this wrapper is the most common Code node failure. We found this our that hard way.

// ❌ Breaks downstream nodes
return { name: "Adam" };
// ✅ Correct format
return [{ json: { name: "Adam" } }];

Never Use {{}} Inside a Code Node

Expression syntax ({{ }}) is for the expression editor in non-code fields. Inside a Code node you write plain JavaScript (or Python if that's your thing). Using {{}} will throw a syntax error.

// ❌ Wrong this is not the expression editor
const name = { { $json.name } };
// ✅ Correct — plain JS access in Code nodes
const items = $input.all();
const name = items.json.name;
const aspectRatios = { 	landscape: '16:9',	square: '1:1',	portrait: '9:16'	};

$input vs Legacy items

The Code node replaced the old Function node. If you're following older tutorials, items are no longer defined directly. Use $input.all() for all items or $input.first() for the first item:

// ❌ Legacy — throws "items is not defined"
items.json.field
// ✅ Modern
const items = $input.all();items.json.field
// Or reference a specific node in Code 
context$('Node Name').all().json.field

Always Set pairedItem in Code Nodes

When your Code node outputs more items than it received, or restructures items, downstream expressions using $('YourCodeNode').item will break unless you manually set pairedItem. This is the item-linking mechanism that keeps the data lineage intact (Simple, layman's terms: this is like a cross-reference. )

// Links each output back to its source input
return items.map((item, index) => ({  json: {    transformed: item.json.value  },  pairedItem: index }));

5. Error Handling Patterns

Never Deploy Without an Error Workflow

Every production workflow should have an Error Workflow set in Workflow Settings → Error Workflow. This catches any unhandled exception and sends a notification containing the workflow name, the failing node, the error message, and a timestamp. Without this, failures disappear silently. We were caught out by this when we first spun up our n8n, thinking that, as with make.com, we'd get emails when something broke, but that's not the case.

What we did is just create a simple workflow that takes the error and sends us an email. What seems a little bit tedious at first is actually quite nice, because the other thing that you can do is you can have different types of error workflows. For example, in certain workflows you may not want to get an email; you may want to get the error written into and sent to a Slack message or what have you. In this way, you can really define what happens when errors get generated off the back of each workflow, and that can be useful.

The Try/Catch Pattern for HTTP Calls

n8n does not automatically treat a 400 or 500 HTTP response as a workflow error — only thrown exceptions stop the flow. Implement explicit status checking:

  1. Enable Retry on Fail on HTTP API Requests (settings tab on the node)
  2. OR Enable Continue On Fail on the HTTP Request node (see below)
  3. Add an IF node checking $json.error or the status code
  4. Route the error branch to a notification/logging step
  5. Route the success branch to continue processing

This is similar to the best practice that we do within our make.com workflows. If you think about it, while we are somewhat spoiled with the robustness of modern APIs, most of the time when you do these kinds of workflows, you are sending over a request to an API endpoint, getting it to do something, and taking it back. There are rare occasions when that API will momentarily fail or not be available, like when you're sending a transcoder job.

Setting the request on fail and timeout, what that basically does is it waits five seconds. That's what I usually recommend: set it to five seconds. It tries the API again, and nine times out of ten it will work and you won't have a failure.

When NOT to Use Continue On Fail

This setting is powerful but dangerous in financial, order, or CRM workflows. Partial writes create reconciliation problems. Use Continue On Fail only when a failed item should be skipped and logged, not retried or reversed.

Advanced: Implement Exponential Backoff for Retries

For transient API failures, use a Wait node with increasing delays rather than immediate retries. Most APIs throttle repeated instant retries more aggressively. Heavily used APIs will often put on rate limits, like, for example, the image generation APIs. This is a useful tactic, but it is not one that I would recommend as default. I would put this in where you know that the APIs are heavy. Again, talking about image generation in our specific use case of video generation, this is a very useful tactic in those situations.

6. Sub-Workflow / Microservices Architecture

Often, people who come to automation platforms like N8n or Make.com are not programmers and are, as one comment on my YouTube channel said, "business owner masquerading as a developer". If this describes you, this is some advice that could save you a lot of time and effort.
An example of how this helps:

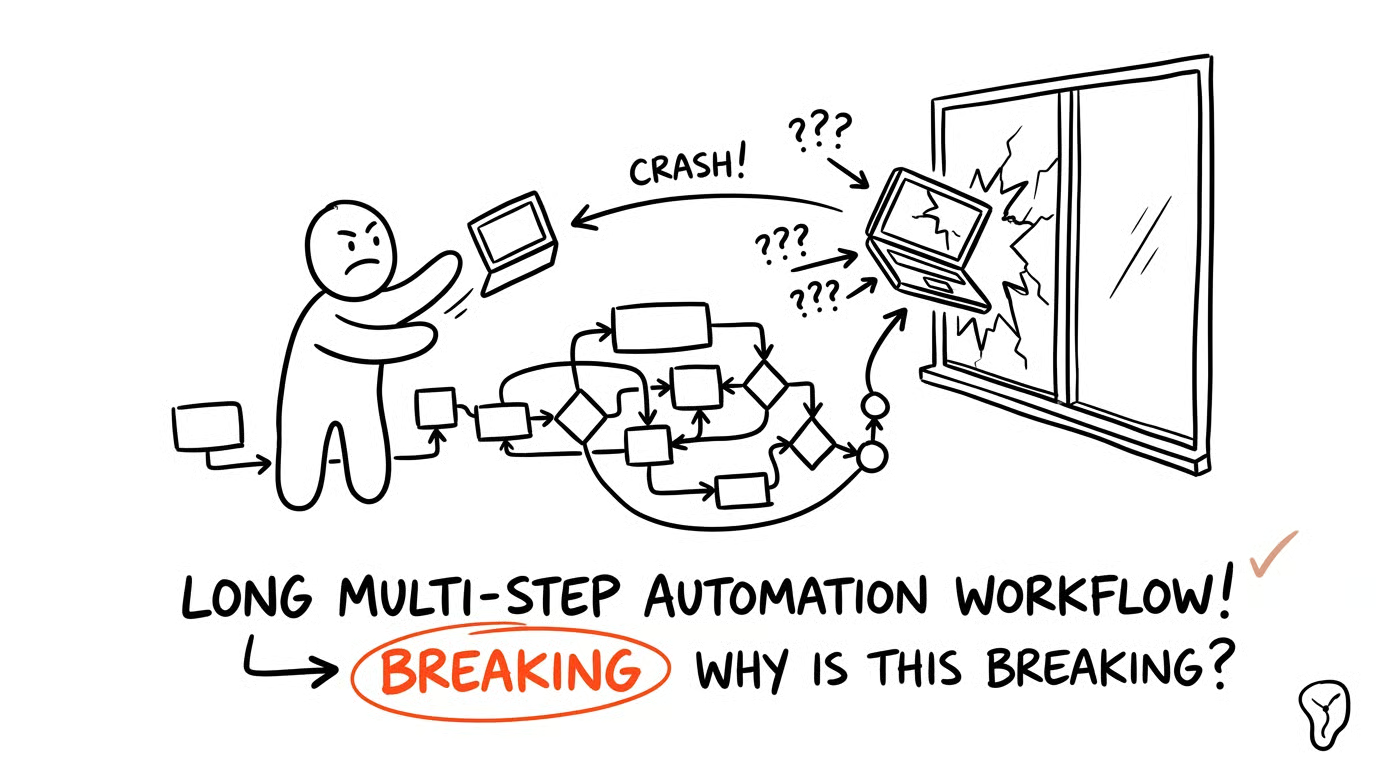
You see all these YouTube videos with massive workflows on a big canvas, 50, 30 different nodes, and I've seen this for any 10 and make dot com. Once you start getting into this, your rule of thumb should be: if you're getting beyond 10, I know people say 20, 30 nodes is fine, but I think if you're getting beyond 10, you should be thinking in a more "microservices" way, and I'll attempt to explain this in non-programmatic language.

Say you have a workflow that optimises your video, because you want to play it on your website. You know that having a video on your website that's optimised for web delivery is going to be a much better user experience, because the delivery will be faster and so on.

And you know you're going to have to optimise it for what's known as form factor. The video on the mobile device should be smaller, and by smaller I mean not just size, but also in terms of the amount of data it has, than, let's say, the desktop, the laptop, or the tablet. In an ideal world, you'd want three versions.

This is when the sort of sub workflow microservices way of thinking about your workflow really comes into play, and I think it's a good story to bring what this means to life. To generate each one of those videos, you will need to have them transcoded, let's use the word optimised to keep it more colloquial. Each of those optimisations is going to be its own run, and you're going to want to do that through some API that allows you to optimise based on what information you give it.

In plain English, that would be: here is a video file; optimise it for mobile, make it 600 pixels wide, don't make it HD. You get the idea.

Now, if you're designing a workflow, you could do that in one go, so you would have something that gives you the source file; then you'd have another node down the road that gives you the desktop version; then you'd have another one that gives you the tablet version; and then you'd have another one that gives you the mobile version. You then finish off that workflow by taking each one of those outputs and storing them somewhere. You may even go further and say, "I don't want to store them. I want this to be pushed into my website as well," so you'd carry on and do that. You don't have to be building the workflow to see that there are already a lot of steps.

I find it super useful just to break down the tasks you want the workflow to do, either on a piece of paper or digitally. It doesn't matter, and you will quickly see what the repeatable tasks are. In the example above, you know that you're going to have to call the API that optimises your video three times, and that is a repeatable, defined job. You may even want to, as you start building out what you're doing, have that optimisation happen in other workflows, so that's a prime candidate for a subworkflow. You will create a sub-workflow that accepts the information from any workflow that you've designed, and it gives you back the destination of the optimised video.

We take the example I've shared above, which is a real one that we've done again as a case study just to help you start thinking in this way. There is another job that you may want to make repeatable and have access to from many different scenarios, and that is pushing these videos into your content management system or your website or wherever you want to end, wherever they need to end up. That's another potential sub-workflow or microservice, whatever terminology is used, but it's a discrete, repeatable workflow.

Here is the big "why should I bother?" question, because you might be reading this. Yes, you are right. You can put it all into one end-to-end workflow, and it'll work. Of course it will, but ask yourself some "what if" questions again when you are designing your workflows.

In the context of this example, it would be: what if I found a cheaper way of optimising these videos? If you're doing it at scale, if you can save 20% on the cost of optimisation, you may want to do that. Or what if I wanted to swap out the end destination that serves these videos? I want to move from Webflow to the latest new CMS or whatever the situation is.

Both of those scenarios, in our case, are highly likely. If we were to build the workflow that I've described in this example in a way where each and every transcoder step is a part of every workflow that requires a transcoder, you can imagine our ability to be able to switch to a cheaper way of optimising the videos (while not impossible) suddenly creates a lot more work in the future.

Because if we design down the sub scenario route, all we would have to do is change that one sub scenario, and suddenly every single video optimisation request is now using the cheaper or more reliable optimisation service.

Or conversely, if we were to swap away from Webflow and have the need to push our videos or content to a different destination, again, it is much easier to update one sub-workflow than to go through and try and remember every single workflow that is pushing content to a serviceable destination.

In this very fast-changing world of AI-driven technology, you want to remove as much friction as you can from your ability to adopt and move towards new or different technology solutions. That ability within your business will also be a big differentiator in how quickly you can act on opportunities driven by new technologies.

As a rule of thumb: Break Large Workflows into Sub-Workflows

Beyond 20-30 nodes, a single workflow becomes difficult to debug and maintain. Extract reusable logic into sub-workflows with strict input/output contracts. Ideal candidates for extraction:

  • Logic used in multiple parent workflows (e.g., "resolve user ID to Slack ID", “transcode a video”, “update related content on an article”)
  • Heavy processing that benefits from fire-and-forget execution
  • Error notification/logging pipelines

Data Passing Gotcha

When using the Execute Sub-workflow node, only the data in the currently active $json is passed to the sub-workflow. If you need data from multiple upstream nodes, use a Merge node first to combine them into a single item, then pass that to the sub-workflow.

Test Sub-Workflows in Isolation

Never test a sub-workflow only by running the parent. Open the sub-workflow directly, simulate the trigger with a Manual Trigger node and pinned test data, and validate it independently before integrating.

7. Variable and Data Management

The "Config" Node is Your Friend

As described above, a Set node named Config at the start of a workflow is the most widely recommended pattern for managing workflow-scoped variables.

  • Centralises all configurable values in one place
  • Makes swapping staging vs production values trivial
  • Ensures downstream references are always explicit named references

Workflow Static Data for Loop State

When you need a variable that persists and updates across loop iterations (not just a config value), use Workflow Static Data inside a Code node. This is the only built-in mechanism for maintaining mutable state within a single execution.

Enterprise vs. Community Variable Scope

Custom Variables (instance-wide constants available in all workflows) are a Pro/Enterprise feature. On the community self-hosted edition, use environment variables ($env.MY_VAR) for instance-level constants, and Set nodes for workflow-level constants.

8. Performance & Scale

Use SplitInBatches for Any Dataset Over ~50 Items

Processing all items in one shot exhausts memory and triggers execution timeouts on large datasets. The SplitInBatches node divides input into chunks and loops:

  • General APIs: batch size 50–100
  • Database inserts: batch size 100–500
  • LLM calls or large payloads: batch size 10–20
  • Billing/financial operations: batch size 1 (fail fast, never partially commit)

Add a Wait node after the HTTP Request in your loop to introduce deliberate pauses and avoid rate limit responses.

Large Binary Data (Like AI Image Generation)

For workflows processing files, set N8N_DEFAULT_BINARY_DATA_MODE=filesystem in your environment. This stores binary data on disk rather than in memory and the database, preventing RAM exhaustion. In layman's terms you want the file to be stored on your disk and not in your memory.

Parallel Execution

Independent branches can run simultaneously by connecting a single node to multiple downstream nodes. This is preferable to sequential processing for tasks that have no data dependency between them.

9. Security

Never Hardcode Secrets in Nodes

Typing API keys or passwords directly into a Set node, HTTP Request, or Code node leaks them into workflow JSON exports, screenshots, and version control. The safe pattern for the community edition is.

Use n8n Credentials system,  for any external service connection. Credentials are encrypted at rest and rotatable without editing workflow nodes.

Secure Every Webhook

Publicly accessible webhook URLs should always use at minimum one of:

  • Header Auth / Basic Auth, built into the Webhook node's Authentication dropdown
  • JWT Auth, validate bearer tokens via JWKS
  • HMAC signature verification, confirm the request came from the expected sender by verifying a shared-secret signature on the payload

Never rely on a secret URL alone. Treat the webhook URL as potentially leaked and enforce explicit auth.

10. Testing & Debugging

Pin Data After Expensive Operations

Use the Data Pinning feature (the pin icon in the Output panel) to freeze node output during development. This is essential after:

  • Webhook triggers (so you don't need to re-fire external events)
  • API calls that cost money or have rate limits
  • Long-running operations (LLM calls, DB queries)

Pinned data is only used during test executions. Production runs always re-execute normally.

Build Incrementally, Pin as You Go

The recommended development loop:

  1. Build one node, configure it
  2. Run and verify its output
  3. Pin the verified output
  4. Add the next node, test with Test Step
  5. Repeat before running the full workflow

Use Smaller Datasets During Development

Reduce batch sizes to 1–5 items and use pinned mini-datasets while building. Scale up to real data only in staging.

Debug Large Workflows

For workflows with performance issues, disable Save Execution Progress in Workflow Settings to reduce database I/O. Use a Code node with console.log(JSON.stringify($input.all())) at the start of sub-workflows to verify exactly what data is being passed from the parent.

11. Versioning & Deployment, for when things get serious.

Treat Workflows as Code

Export workflow JSON to Git for version control. n8n Enterprise includes a built-in Source Control feature (Settings → Source Control) that connects directly to a Git repo and supports branch-based promotion (dev → staging → prod).

For community edition, which we are using, use separate n8n instances per environment and export workflow JSON manually or via the n8n API (POST /source-control/pull).

Credentials Are Not Versioned

When using n8n's Git source control, credentials are intentionally excluded from the repository by design. Manage credentials separately per environment. Never commit credential values to version control.

Tag Everything

Use n8n's workflow tags to encode environment, service, version, and deployment status. Example tag schema: env:production, service:events-pipeline, v1.4, status:deployed. This makes filtering and auditing at scale tractable.

Quick Reference: A n8n Gotchas Summary

Gotcha What breaks Fix
Using $json.field in expressions Silently references wrong node after a reorder Always use $('Node Name').item.json.field
$node["Name"] (suggested by some LLMs) instead of $('Name') Index-based matching breaks when item count changes Use $('Name') — $node[] is deprecated
Field in Fixed mode, not Expression mode Expression treated as literal string Toggle field to Expression mode first
Webhook data at $json.field Returns undefined Access via $json.body.field
Missing pairedItem in Code node Downstream $('CodeNode').item breaks Always include pairedItem: index when mapping items
No {{ }} return wrapper in Code node Downstream nodes receive malformed data Return [{ json: { ... } }] always
items variable in Code node Throws "items is not defined" Use $input.all() instead
Hardcoded secrets in Set/Code nodes Secrets leak into JSON exports Use n8n Credentials or $env.VAR_NAME
No Error Workflow set Failures disappear silently Set an Error Workflow in every production workflow
Passing data from only the last node to sub-workflow Missing upstream data in sub-workflow Merge all needed data into one item before Execute Sub-workflow
Testing sub-workflows only via parent Bugs are harder to isolate Always test sub-workflows independently with pinned data
Processing large datasets without batching Memory exhaustion, timeout failures Use SplitInBatches with appropriate batch sizes

behind the scenes

To continue reading

n8n Best Practices & Gotchas: A Production Reference

you need to sign up to Behind the Scenes or log in if you're already a member.

Signing up means you can help shape the experiments we run and get full access to Long Shares you can put to work in your own business.